Showing posts with label Quilt Pattern. Show all posts

Saturday, 29 August 2015

Oasis Quilt Sew Along - Finishing Your Quilt

Oasis Quilt Sew Along with One Thimble

Have you been following the Oasis Quilt Sew Along being hosted by One Thimble? If not, you definitely should check out the great quilts by following the hashtag #oasisquiltsewalong on both Facebook and Instagram. There have been some fabulous fabric combinations chosen.

If this is your first quilt, you're probably now staring at your gorgeous quilt top thinking "Awesome!!!!....now what on Earth do I do with it?". I'm here to give you a few ideas on how to turn your beautiful quilt top into an even more beautiful quilt.
Your next step will be to create a quilt sandwich. This is when you baste your three layers together in preparation for quilting.
Basting your quilt
Basting your quilt
The three layers consist of the quilt top, the batting of your choice, and the quilt backing. There are numerous methods for basting your quilt, so here are a few for you to consider:
  • Using a basting spray to temporarily glue your layers together. My preference is the 505 Spray and Fix, but there are other brands available. 
  • Pinning your layers using curved safety pins (or any pins that suit you). You want to make sure that your pins are close together to ensure the layers don't move during quilting. They should be no more than about 4'' apart. It's not uncommon to use hundreds of pins when basting a quilt.
  • Hand stitching the layers. Stay with me...I haven't lost my marbles. In fact, I can tell you first hand that it's not as crazy as it sounds. I had no basting spray when it came time to baste my Oasis Quilt so I decided to try hand basting. I assure you it is quick, easy and effective. In fact, I'm strongly considering changing it to my preferred basting method.
  • Fusible batting. Yes, such a thing exists and it sounds totally wicked. I've heard great things about it but haven't used it myself, so I can't give a personal review. It's definitely out there to try though.
The process of actually getting the layers in place to baste them is also open to a zillion different methods, including:
  • Similar to above, but placing the layers on a table and securing them tightly to the table edges (e.g. using large bulldog clips).
  • Board basting (Sharon Schamber Board Basting Part 1 and Part 2). I had been eyeing off this method for ages but had never tried it until my Oasis Quilt. I'm so glad I did because it is truly brilliant. Even with the hand stitching it was quick to both baste and to remove while quilting. I'm definitely converted and will be using this method more often.
The most important thing to remember with basting is that layers need to be flat and tight, but not stretched. If you take the time to baste properly, then you will have a much more enjoyable quilting journey.
Time to quilt
Time to quilt
After you've basted the quilt, you need to actually quilt it. 'Quilting' is the term used for all of those fancy stitches you see that hold the layers together. You can achieve this by using your walking foot to sew straight lines, your darning/free motion quilting foot to sew fancy designs, or quilting by hand. You can also tie your quilt (you'll need to Google that one as it's not a method I've tried...yet). For a detailed quilting tutorial, read Beginner Quilt Along: Quilting, Quilting, Quilting.

For the Oasis Quilt, I chose a very simple, straight line design. I echoed the diamonds by sewing on the sashing about 1/4'' from the seam. I then continued the lines past the centre piece to create a lovely, subtle diamond pattern in the plain sections.
If you look closely you can see the quilted diamonds
You can also send your quilt out to be professionally quilted. If you choose this method, I would recommend contacting your quilter to discuss any specific requirements (i.e. do they expect the backing piece to be a particular size? Do you leave it unbasted? Will you be supplying batting or will they?). 
Binding the quilt
Next, we bind
Finally, once you have quilted your quilt, you need to bind it. This hides the raw edges and creates a lovely frame for your quilt. As always, there are a number of ways to bind your quilt but here's the method I use: Beginner Quilt Along: Binding and Finishing the Quilt. One thing to remember is that you don't need bias binding for a quilt (unless it has curved edges). Straight cut binding works a treat.

That's probably enough information for one day hahaha.  As you can see, there's still a bit involved in finishing your quilt but trust me, if you take your time and tackle it one step at a time, it will definitely be worth it.

Don't forget to check out all of the lovely quilts by following the hashtag #oasisquiltsewalong on both Facebook and Instagram.

The Oasis Quilt Pattern is available in the One Thimble Issue 8 digital magazine or as a standalone PDF pattern.

For more beginner quilting advice, visit my Beginner Quilt Along page.

Friday, 21 August 2015

Oasis Quilt Sew Along

Oasis Quilt Sew Along
Please note that this blog post contains affiliate links. If you purchase a copy of the One Thimble digital magazine through these links, I will receive a small commission.

In case you haven't already heard, there will be a super fun sew along in the One Thimble Sewing Enthusiasts Facebook Group next week...featuring none other than my rather awesome Oasis Quilt Pattern.

Oasis Quilt Pattern

Read more about Jen's brand new quilting journey, and her decision to host this sew along, in her latest blog post.

Let's get down to some sew along business, shall we?

If you have never made a quilt before, have no fear. I will be by your side during the sew along (or any time for that matter) to answer any questions you have. I also have a number of tutorials in my Beginner Quilt Along that may assist you. If you're unfamiliar with constructing a quilt I highly recommend you have a quick read of these tutorials. They will help bring you up to speed with terminology and ease your mind before beginning this great new adventure.

The Oasis Quilt is a great project for beginners. It's easy, though still interesting to piece, and the small size makes it perfect for learning quilting.

Choosing fabric need not be stressful. I designed the quilt with simplicity in mind. A garden oasis within the surrounding desert. When selecting your fabric, keep the following in mind:
  • Use a simple background fabric so as not to take the focus away from the diamonds. Plain/Solid or tone-on-tone fabrics work well.
  • If you're particular about pattern placement on fabric, avoid directional prints or fussy cutting in both the background and diamonds. It could look very funky, but it will add unnecessary stress if this is your first quilt (or first time strip piecing in this manner).
  • As you can see in the photos below, the diamonds look great in both solid or patterned fabric. 
You could choose to use a range of shades of a single colour...
Quilt by Joanne
Quilt by Joanne

Quilt by Tash (Sew Many Stitches Tasmania)

Quilt by Tracey
Quilt by Tracey
...or multiple, individual colours.
Blue and yellow Oasis quilt
My first prototype using only two colours

The original oasis quilt
The Original Oasis Quilt
If all else fails, and you really can't decide, simply choose four shades of your favourite colour in a plain/solid fabric. For the background, use black, white, grey or a cream/natural colour.

Fabric Preparation
I recommend pre-washing the fabric for this quilt, particularly if you are using a range of light and dark fabrics. It's better to be safe than sorry and trust me, you don't want to spend hours piecing, quilting and binding to then have the quilt ruined the first time you wash it.

I also recommend starching your fabric as it will help to prevent it stretching once it is cut on an angle. To do this, I spray the starch on one side, then flip it over and iron the other side. This stops starch building up on your iron. I then repeat so that both sides have been starched. It seems like extra work and it's very tempting to skip it, but I can assure you it's worth the time. I made a few prototypes for this quilt and the ones I took the time to prepare properly were much easier to sew.

Where to from here? 
Gather your fabric, pre-wash, starch and iron it ready for next week. There is no need to cut anything yet. Remember to grab your copy of the Oasis Quilt Pattern too, either as a stand alone PDF or in One Thimble Issue 8.

If you have any questions, please don't hesitate to ask in the One Thimble Sewing Enthusiasts Facebook Group. I'm really looking forward to starting our new adventure and can't wait to see your fabric choices.

Thursday, 13 August 2015

Oasis Quilt Pattern and One Thimble Issue 8 Release

Oasis Quilt Pattern One Thimble Issue 8

It's time!!! After months of hard work the Oasis Quilt Pattern has finally arrived.

Psst: This blog post contains affiliate links. If you purchase a One Thimble digital magazine through these links, I will receive a small commission.
Oasis Quilt Photos
Oasis Quilt Photos (Courtesy of the fabulous Sew Today, Clean Tomorrow testers)
An enormous THANK YOU to Jen, from One Thimble for her amazing support, assistance and encouragement. I couldn't have dreamed a more perfect initiation into the world of magazine pattern submissions.

As you know, the Oasis Quilt Pattern is being released as a part of One Thimble Issue 8. If you're unfamiliar with One Thimble, it's an awesome sewing magazine filled to the brim with patterns, tutorials, articles and a zillion other goodies.

One Thimble Issue 8 Out Now
Here's a little peek at the great patterns in Issue 8...
One Thimble Issue 8 Out Now
Fantastic Issue 8 Patterns
I have also written two short articles for this issue: Five Tips to Starting Your Quilting Journey and A Quick Guide to Using Your Quilting Ruler.

To purchase One Thimble Issue 8 click on this affiliate link. Alternatively you can buy the Oasis Quilt Pattern as a stand alone PDF for $7AUD here.

Remember to share your creations in The Sew Quilty Workshop or on Instagram using the hashtags #sewtodaypattern and #oasisquiltpattern (don't forget to tag me @sewtodaycleantomorrow).

If you have any questions regarding the pattern, please do not hesitate to email me at sewtodaycleantomorrow@gmail.com or visit my Facebook page.

I hope you enjoy my first magazine submission. Fingers crossed there are many more to come.
Oasis Quilt Pattern
Oasis Quilt Pattern

Sunday, 2 August 2015

Introducing the Oasis Quilt Pattern

It finally happened!!! A pattern of mine will be in a magazine. Not just any magazine either. THE magazine.

One Thimble Logo

When Jen first told me that she liked my quilt proposal I could barely contain my excitement. In fact, I had to read the email a few times just to make sure I'd read it correctly. It turns out I had (phew), so I quickly started planning size, technique, fabric, and everything else needed to make a great quilt pattern. After many long hours of planning, making a prototype, stuffing up the prototype and making it again, writing and testing, I can very proudly announce the soon-to-be arrival of my...

Oasis Quilt Pattern Collage
A little sneak peek at some of the great tester photos.
This pattern is aimed at the confident beginner and uses simple strip-piecing to produce a beautiful, eye-catching cot/small lap quilt.

I had planned on going into a little more detail, with a lot more photos, but I think I will leave you hanging until closer to the release date MWAHAHAHA (that's my evil laugh by the way).

Keep an eye on my Facebook Page and sign up to my blog to keep up-to-date with all of my Oasis Quilt Pattern shenanigans.

Friday, 17 July 2015

Pinwheel Cushion Pattern

Pinwheel Cushion Pattern Free PDF

Remember the Pinwheel Block Tutorial I released last week for the Blockalogue? I just couldn't get enough of them and ended up whipping up this funky cushion.

Pinwheel Cushion
Funky Pinwheel Cushion of Awesomeness
Pretty cool, right? I thought you'd say that, so I also whipped up this Free PDF Pattern: Pinwheel Cushion Pattern.

The pattern includes detailed instructions and diagrams for piecing the front of the cushion...

Sample piecing diagram from pattern
Look how great these diagrams are
...and for inserting the zip closure.

Sample zip diagram
I was a bit proud of my zip
There's even a sneaky little peek at an exciting big announcement I will be making next week. Shhhh....you'll have to download the pattern to find out.


Sunday, 8 March 2015

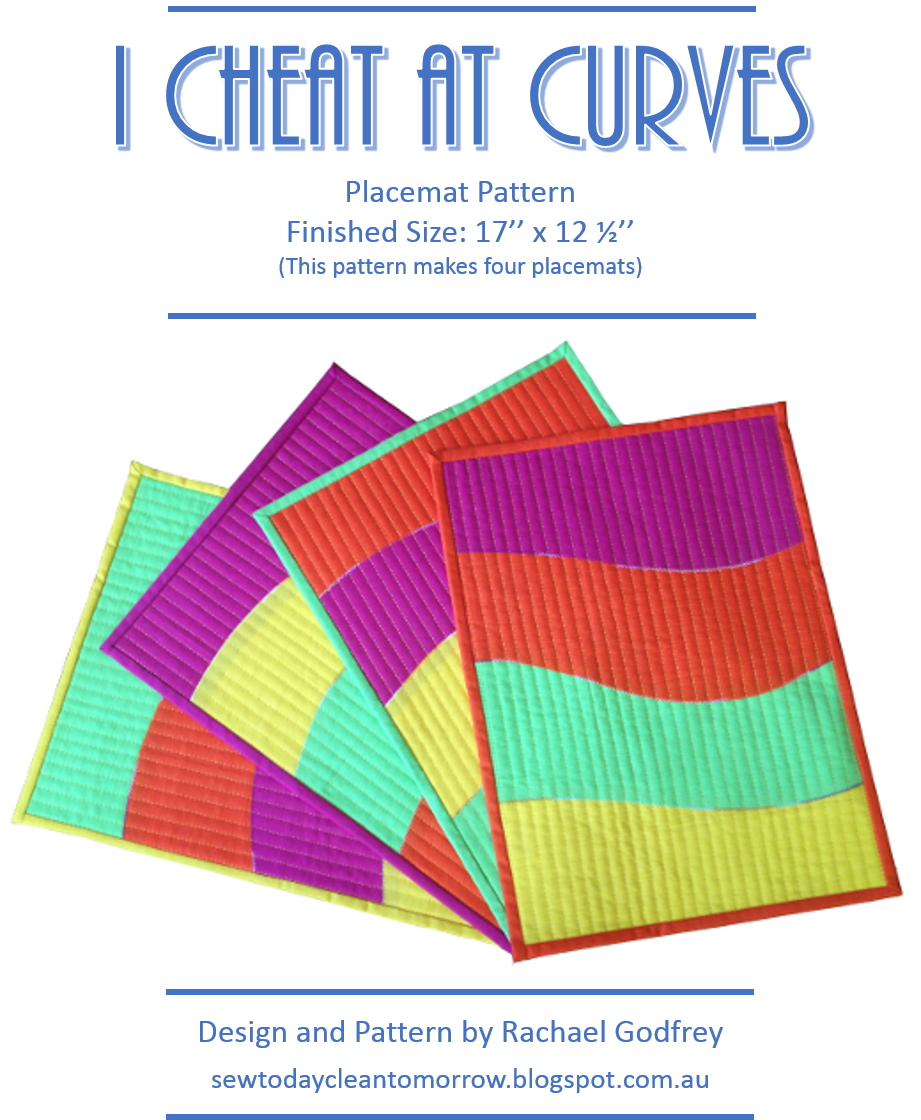
I Cheat at Curves - Placemat Tutorial


I Cheat at Curves - Placemat Tutorial

Don't be intimidated by the curves. As the name suggests, I have a sneaky little trick that will have you whipping out placemats in no time.

This tutorial has been written to compliment my free I Cheat at Curves PDF pattern. You will need to download the pattern from Payhip for this tutorial to make any sense.

I Cheat at Curves Free PDF Pattern
Free PDF Pattern available from Payhip
These placemats are quick and easy to make...and just as quick and easy to adjust. You can really make them any size you like. Just cut your rectangles approximately 2'' longer  and about 1'' wider than your desired finished size.

You could use more or less fabric as needed. For example, if you want six placemats, simply cut six rectangles. You could even cut more curves for a really funky look.

Let's get started...

Stack your fabric so that the right sides are all facing up and the raw edges are aligned.
Fabric Stacked
Stack the fabric with raw edges aligned.
Slice through all four fabrics, dividing them into four roughly equal parts. As you can see here, I am slicing a very gentle curve. If it's too rounded, it will be more difficult to sew.
Slice easy curves
Slice easy curves, dividing the fabric into four roughly equal parts.
Rearrange the fabric, as detailed in the pattern, so that each placemat now contains one strip of each fabric.
Fabric Rearranged
Rearrange the fabric, as detailed in the pattern.
Starting with the first placemat (i.e. the top four strips), take the first and second strip and overlap them 1/2''. The raw edge of the top strip will be visible.
Overlap the strips 1/2''
Overlap the strips 1/2''. Right sides of both fabrics are facing you.
You can pin here...
Pin the strips in place
Pin the strips in place.
...but I found glue basting to be a much quicker method.
Glue basting is a great alternative
Glue basting is a great alternative.
It is important that the fabric is flat before sewing, even if it means using a little more than 1/2'' for the overlap.

Zigzag along the raw edge. You could use any decorative stitch here. You could even just straight stitch 1/8'' from the edge and have a pretty cool raw edge effect.
Sew along the raw edge
Sew along the raw edge.
Practice on some scraps first to find the zigzag settings that appeal to you. I used a very funky variegated Aurifil thread for my zigzag. This is why you can see some light and dark sections along the seams. In hindsight, I probably should have stuck with the orange I had planned, but it still looks kinda cool and adds a little depth I feel.
Strips have been stitched together
Strips have been stitched together.
Join the remaining strips in the same fashion.
One placemat complete
The first placemat top is complete. For the record, Yes, I did iron the fabric first.
Continue until you have made all four placemats.

I trimmed my placemats before quilting, for no reason other than I had a brief moment of insanity and forgot I had to quilt it. It was fine though and I only had to trim it a tiny bit again after quilting to ensure it was square.

I used a gorgeous yellow Aurifil thread and quilted simple horizontal lines, using the walking foot as a guide.
Simple straight line quilting
Simple straight line quilting.
For quilting and binding tutorials, check out my Beginner Quilt Along series.
Completed Placemats.
There you have it. Quick and easy placemats that will have everyone ooo-ing and aah-ing over how fabulously daring you are to try piecing curves. Don't worry, I won't tell if you don't *wink* *wink*.

Monday, 8 December 2014

One Step Closer

Easy Panel Quilt
My secret squirrel project
If you're following me on Facebook or Instagram then you will have seen a few teasers about a secret project I've been working on. I'm here to tell you that it's finished and I can finally reveal what the excitement was all about.

A few months ago I was doing the usual Friday night Facebook stalk through some sewing and business groups when I came across someone looking for a quilt pattern writer. My main goal is to become a pattern writer for other designers, so this was a prime opportunity. Common sense dictated that I should promptly ignore the comment, scroll on and remain cosy and warm in my comfort zone. I was obviously still buzzing from the release of It's All Black and White though, because instead of ignoring the post, I commented. GULP. One thing led to another and I was quickly talking patterns with the lovely ladies at Sew Creative Supplies.

If you haven't visited their website before then do so now...or at least once you've finished reading this post. They have a great selection of fabric, sewing supplies, bag supplies and much, much more. You can also find them on Facebook at Sew Creative Supplies.

Anywho, back to the pattern. The requirement was simple. Create a pattern, suitable for beginners, from a design I was provided with. It went further than this though. Unlike other beginner patterns, this would provide details beyond "sew together...quilt and bind as desired". I know from personal experience how frustrating some beginner patterns are, so I was very excited to see somebody taking a few steps away from what seems normal and really wanting to provide meaningful and useful information. A little back and forth between us and voila, our pattern was complete...as was the gorgeous quilt you see here.

Easy Panel Quilt
Isn't she great?
Sorry I don't have more photos. The weather has been disgraceful down here and we only had a very short window of time to whip out some photos before it rained...again.

I believe the pattern will be released some time after Christmas, but I was just too excited to keep it secret any longer. This is my first step into the pattern writing world and I certainly hope it's not my last.

Let's hope this is the beginning of a beautiful friendship. 

Monday, 27 October 2014

They Can't All Be Winners...or Can They?

Easy HST Quilt
Easy Half-Square Triangle (HST) Quilt
This is my latest quilt top. It’s been tormenting me for a while, as you can see here, but I finally finished her!!!

I've included a very brief tutorial at the end of this post, because it turned out to be a lot more popular than I anticipated. The truth is, I wasn't even going to show you as I simply didn't think it was worthy of a public viewing. Funnily enough, this quilt is now starting to hold a lot of meaning to me. Not just because it does look pretty funky, but, because it really had me thinking about who I am and where I'm going with this blog. 

It's so easy to become caught up in the whole blogging world. Following all the big names and drooling in envy at their incredible, award winning creations. It's hard not to use that as some sort of benchmark for your own blog/quilts. The problem with that is, it's just not me. I don't want to be a prize winning artist (not that I'd complain mind you). I just want to teach and show the world that anyone can be a quilter. To be proud of what you create, even if you think someone else’s is better. I want to show my mistakes as well as my triumphs. Most of all, I want to show that you can create something meaningful no matter what your skill level may be. 

What does this have to do with my quilt? 

I started this quilt as nothing more than a way of practising half-square triangles (HSTs). It was destined for the spare room and never intended to be a work of art. Not long after starting, however, the self-doubt kicked in. It wasn't pretty enough. There was nothing impressive about it. No one will like it (this cracks me up because it's not like my spare room has a high turnover of guests). Other quilting bloggers will think I'm a joke. The list of internal taunts goes on and on (I never claimed I was entirely sane). 

It all turned around when I was sewing the last few seams. I'd settled on this layout because it was simple, yet effective. Exactly what I like for my blog. It is definitely an 'anyone can make this' quilt. Something else I like on my blog. Most of all, it showed that things don't always go according to plan. Hmmm my blog again?? That's when I realised that I had lost my focus. I was so caught up in everyone else being marvellous that I didn't even realise that this quilt represented everything about my blog. Simple, funky, a great learning experience and it shows that you don't need a work of art to have a beautiful quilt. 

Isn't it funny? It wasn't a prize winning quilt, or a fantastic business opportunity that reminded me of where I wanted to be...it was just something to throw over the rarely used spare bed. I guess it really is the little things ;)

Anywho. That's probably enough touchy feely for one day, so, let's get down to this tutorial business. 

I won’t go into a lot of detail as this really was a quick and easy sew.

Requirements
This quilt measures approximately 72’’ x 90’’.
1 x White Layer Cake (or 40 x 10’’ squares)
1 x Patterned Layer Cake (or 40 x 10’’ squares)

Steps
Separate the squares into 40 sets of one white and one patterned piece.

On the wrong side of the white piece, draw a line diagonally across.

Draw a diagonal line
Place the white square on the patterned square, right sides together. Sew ¼’’ away from either side of the drawn line.
If you don’t have a ¼’’ foot, draw one line ¼’’ from either side of the diagonal and sew along those lines.
Sew 1/4'' from each side of the line
Cut along the diagonal line creating two units.
Cut along the diagonal
Open the triangles and press the seams open or to one side (I pressed open for this quilt).
Press the units open
You should now have 80 HST units.

Arrange them in the following fashion and sew together. I joined the blocks into rows first and then the rows together.
Final Layout
Final Layout
See, I told you it was easy ;)

For more HST hints, download my free pattern It's All Black and White from Craftsy: http://www.craftsy.com/pattern/quilting/other/its-all-black-and-white/116532


Tuesday, 14 October 2014

Free PDF Quilt Pattern: It's All Black and White

Free PDF Quilt Pattern

Release Day is here!!! I'm very excited and a wee bit proud to introduce you to my first quilt pattern It's All Black and White.

I originally created this design as a 'part two' to my Beginner Quilt Along. I was looking for an interesting method for introducing new quilters to half square triangles. During the design phase, I was struggling to find something that both looked good and fit in with the learning strategy I had planned. After a few failed attempts I went back to the drawing board, literally, and drafted a very basic, black and white quilt with triangles...and It's All Black and White was born (a.k.a The Black and White Quilt of Awesomeness).

This PDF is a standard quilt pattern with a few shiny little Sew Today, Clean Tomorrow extras. Here's a sneak peek at the contents:
  • Fabric Requirements
  • Cutting Instuctions
  • Piecing Instructions
  • Backing Options
  • Quilting and Binding
  • Design Template
  • Hints and Tips
  • Alternative Quilt Sizes
At this stage the pattern has only been tested by yours truly. I have taken great care to ensure the information is correct and accurate but please do not hesitate to contact me if you have any concerns.

I would love your feedback on this pattern, whether you actually create a quilt or simply read through it. I will use this to ensure my future patterns are more suited to your needs. 

I know you're all as excited as me to download the pattern so here it is. I can't wait to hear what you think.


It's All Black and White Quilt Pattern

Tuesday, 16 September 2014

W.I.P Wednesday: Black and White Awesomeness

Black and white quilt preview
A preview of my black and white quilt.
You've seen the pictures, now it's time to hear the story. Today I have decided to interview myself and discuss the funkiness of my latest quilt.

Why this pattern?
I wanted to create a suitable 'next step' quilt for the Beginner Quilt Along participants. Something with slightly more interesting techniques, but still simple enough not to be intimidating. It absolutely had to have half-square triangles (HSTs) as they are my bestest friend forever in quilting.
Black and white half-square triangles
I love HSTs!!!
Why black and white?
To be honest, the black and white was an accident. I was playing around with a few different colour schemes and couldn't quite get the balance I wanted of pretty yet uncomplicated. I threw black and white into my draft because I wanted to see the contrasting blocks. I had planned on then experimenting with colour, but, it looked so great I simply had to go with it.
Single black and white blocks
Even as single blocks they look great.
Don't worry if you're not a fan of black and white. It actually looks pretty funky in a range of colours. I'm already planning red and white, and I think Pepper is eyeing off a pink and white one.

When can I get my hands on this awesomeness? 
Woah there cowboy. The pattern won't be ready for a few weeks yet. I'm hoping to use this as a kind of global test for my future patterns. I really want to make sure it's correct before I release it. I'm then hoping for a lot of feedback to help me ensure my future patterns are exactly what you want. Follow my blog via email, using the email box on the right-hand side, and you will be notified when the pattern is released. Alternatively, you can follow me on bloglovin.

Did you say free?
Um, no...but it will be. As I said, I will be using this as a test run for future patterns. By providing feedback you are helping me just as much as I will have helped you. It's a circle of life thing.
Black and white quilt top again
Another look because it's just too funky.
What do you think? Have I pulled it off or is it a bit try-hard? Comment below with your thoughts.