Last Monday I announced the very exciting news that I would be hosting a sew-along for the great new Run and Play Bag by Aussie designer, For My Little Monster. You can read all about it here, including details of the fantastic prizes up for grabs!!!
By now you should have printed your pattern and have your fabric, interfacing and fleece/stabiliser cut out and ready to go. If you're not at this point yet don't panic. I have broken each day into very small sections so you will easily be able to catch up should life get in the way (as it nearly always does).
 |
| All cut up and ready to sew |
Hint: Keep the paper pattern pieces pinned to the relevant fabric/interfacing/fleece pieces for easy reference and to help stay organised.
I started by fusing the medium weight interfacing to the required pieces. Here are a few tips when doing this:
- Check that you have the glue side of the interfacing (usually the shinier side) against the wrong side of the fabric. You don't want to be fusing interfacing to the right side of the fabric or worse, to your iron!
- Press and hold the iron on the fabric, rather than moving it back and forward as you would when ironing clothes. This will prevent the pieces from stretching or moving under the iron.
- Press for about 5 - 10 seconds in each spot and confirm that the glue has taken hold. If not, press again. Be sure to fuse to the entire piece of fabric. Don't miss a spot.
- I sometimes find it helpful to lightly spray the fabric with water and then press. It seems to help with the fusing process (of course, it could all be in my head too).
- Use a pressing cloth if you're that way inclined. I do if I'm worried about marking my fabric.
- Take your time. It's worth the few extra minutes to have your pieces fused perfectly.
If you find any interfacing hanging over the edge of the fabric once fused, trim it back. This makes life much easier when trying to align raw edges later on.
 |
| Fusible interfacing attached |
Next attach the fusible fleece/foam stabiliser. I opted for the foam because it's what I had on hand (though I did use fleece for the shoulder strap pieces).
If you're using fusible fleece, you can apply the same technique as with the fusible interfacing. If you're using foam, then baste it to the wrong side of the fabric by stitching approximately 1/8'' around the edges. Make sure the fabric is nice and taught, though not stretched, against the foam. You don't want any puckers.
Again, trim any excess fleece/foam so that your pieces are shaped as per the pattern.
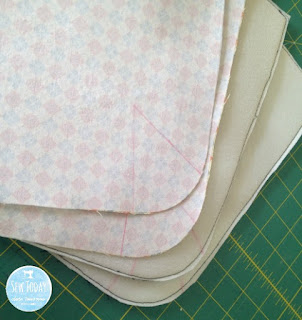
 |
| Fleece/Foam attached |
Finally, transfer the darts from the pattern pieces to the wrong side of your fabric/fleece/foam. I did this a little differently (i.e. lazier) than the way shown in the pattern.
Place the pattern on the wrong side of the fabric, aligning the edges.
 |
| Lay down the pattern piece |
 |
| Fold and draw along the first leg |
 |
| Repeat for the second dart leg |
 |
| Ready for the next step. |
Don't forget to head on over to the 2 Ladybugs, 4 Little Monsters and a Pattern Lover Group on Facebook and post photos of your progress. You can also join in on Instragram using the hashtag #runandplaysal.


I think this article will fully complement you article. Please continue publishing helpful topics like this. Regards, from
ReplyDeletemove out cleaning
home cleaning Sydney
maid service