Don't be intimidated by the curves. As the name suggests, I have a sneaky little trick that will have you whipping out placemats in no time.
This tutorial has been written to compliment my
free I Cheat at Curves PDF pattern. You will need to download the pattern from Payhip for this tutorial to make any sense.
These placemats are quick and easy to make...and just as quick and easy to adjust. You can really make them any size you like. Just cut your rectangles approximately 2'' longer and about 1'' wider than your desired finished size.
You could use more or less fabric as needed. For example, if you want six placemats, simply cut six rectangles. You could even cut more curves for a really funky look.
Let's get started...
Stack your fabric so that the right sides are all facing up and the raw edges are aligned.
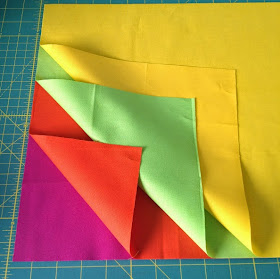 |
| Stack the fabric with raw edges aligned. |
Slice through all four fabrics, dividing them into four roughly equal parts. As you can see here, I am slicing a very gentle curve. If it's too rounded, it will be more difficult to sew.
 |
| Slice easy curves, dividing the fabric into four roughly equal parts. |
Rearrange the fabric, as detailed in the pattern, so that each placemat now contains one strip of each fabric.
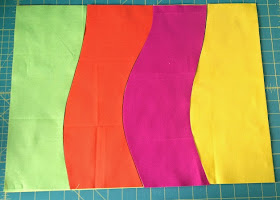 |
| Rearrange the fabric, as detailed in the pattern. |
Starting with the first placemat (i.e. the top four strips), take the first and second strip and overlap them 1/2''. The raw edge of the top strip will be visible.
 |
| Overlap the strips 1/2''. Right sides of both fabrics are facing you. |
You can pin here...
 |
| Pin the strips in place. |
...but I found glue basting to be a much quicker method.
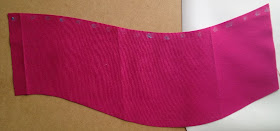 |
| Glue basting is a great alternative. |
It is important that the fabric is flat before sewing, even if it means using a little more than 1/2'' for the overlap.
Zigzag along the raw edge. You could use any decorative stitch here. You could even just straight stitch 1/8'' from the edge and have a pretty cool raw edge effect.
 |
| Sew along the raw edge. |
Practice on some scraps first to find the zigzag settings that appeal to you. I used a very funky variegated Aurifil thread for my zigzag. This is why you can see some light and dark sections along the seams. In hindsight, I probably should have stuck with the orange I had planned, but it still looks kinda cool and adds a little depth I feel.
 |
| Strips have been stitched together. |
Join the remaining strips in the same fashion.
 |
| The first placemat top is complete. For the record, Yes, I did iron the fabric first. |
Continue until you have made all four placemats.
I trimmed my placemats before quilting, for no reason other than I had a brief moment of insanity and forgot I had to quilt it. It was fine though and I only had to trim it a tiny bit again after quilting to ensure it was square.
I used a gorgeous yellow Aurifil thread
and quilted simple horizontal lines, using the walking foot as a guide.
 |
| Simple straight line quilting. |
For quilting and binding tutorials, check out my
Beginner Quilt Along series.
 |
| Completed Placemats. |
There you have it. Quick and easy placemats that will have everyone ooo-ing and aah-ing over how fabulously daring you are to try piecing curves. Don't worry, I won't tell if you don't *wink* *wink*.


so easy but so wowww! this definitely is a LIFO on my tosewlist. thanks for sharing ♡ ♡
ReplyDeletecheers, esther
Thanks Esther :D I'm secretly waiting till I have some spare time to whip myself up some more of these hehehe. So much fun to make.
DeleteReally like this idea! I am thinking of using some solid fabric with coordinating floral patterns for a spring/summer set of placemats.
ReplyDeleteThanks. I'm really glad you like it. It sounds like your placemats are going to look fantastic :D
DeleteIf I am only using 3 colors, can I just cut the pieces in equal thirds instead of fourths?
ReplyDeleteRegarding the placemats: What kind of fabric would you suggest? I’m thinking that a cotton one would be easy to stain. What would you suggest?
ReplyDelete