 |
| Quilting |
Welcome back. I've seen some beautiful quilt tops in our Facebook group. How did yours turn out?
This week is all about quilting. You will need:
- Your completed quilt top
- Basting spray and/or pins - if using a spray, please read and follow the instructions on the can.
- 1.5 yards of backing fabric
- At least 40'' x 49'' of batting
- Thread and needle for quilting
- Walking foot.
Fun fact: We quite frequently use the term 'quilting' to describe making a quilt, but, did you know that the pattern of stitching, that holds the three layers together, is also called quilting?
The first step for quilting is to prepare your quilt top and backing fabric. Give them a good iron and make sure they're free of wrinkles, with the seams sitting neatly. Starch can really help.
Next we baste the quilt. Basting is when you temporarily join the front, middle and back of the quilt to hold everything in place. This can be done in a number of ways. I will show you my method here, but if it doesn't suit, a quick Google search will bring up a variety of other techniques.
There are so many possibilities with basting that it really will come down to your personal situation. Do you have a table or will you use the floor? Are you using a spray or pins? How big is the item being quilted?
Over time you will find a method that suits you. Don't be too concerned if it's not perfect the first time around. Mine certainly wasn't. My first quilt was a gift to my Nan and full of mismatched seams and tucks on the back. She still loves it though and that's all that matters.
Anyway, let's get started and make our quilt sandwich. Yep, it's actually called a quilt sandwich. It's not just some crazy term I invented.
Lay the backing fabric, with the right side facing down, on to your surface. Secure the edges of the fabric to keep it in place. I have used tape, but a heavy object like hand weights or books work too. You want it tight and smooth but not stretched. Take the time to smooth it properly and make any necessary adjustments.
 |
| Secure the edges of the fabric. Use more tape if needed. |
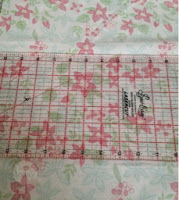 |
| A ruler can really help with smoothing the fabric. Take care not to stretch it. |
Note: I have basted on carpet in these pictures, but, I actually find it easier on a hard surface like a wooden floor or table top. I have successfully spray basted a quilt on carpet, without taping it down, but I would not recommend that for your first time.
Once you're happy that the backing fabric is as smooth as possible, lay the batting into the centre of the fabric.
 |
| Lay the batting on the backing fabric. |
You want a few extra inches of backing fabric around the edges. This ensures everything will fit, even if there's some movement during the basting or quilting process. Don't worry about the excess fabric at the bottom. That can be trimmed once you're happy with your basting.
Smooth the batting until it's wrinkle free. If you're pin basting, you can ignore these next steps and simply secure the batting, as you did with the backing fabric (e.g. tape, books, etc.). Do not pin it yet though, as your pins will end up inside your quilt.
If you're spray basting, roll the batting up as shown in these photos. This will make it easier to spray a little at a time.
 |
| Start from the bottom and roll the batting towards the top. |
 |
| Keep going until you are 5'' or so from the top. |
 |
| Now fold the top back |
 |
| You batting is rolled and ready to spray. |
I will be spraying the batting, not the fabric, as per the instructions on the can. I have, in the past, sprayed the fabric first, though, without issue.
Spray the top of the batting, roll it onto the fabric and smooth it from the centre out. This will stick the batting to the fabric. You can re-position it if need be. Just keep going until you feel it's secure. Remember that you want the batting smooth, not stretched.
Note: I have read suggestions that you should not smooth the batting out but rather pat it down until it sits flat. I haven't had an issue with smoothing, but, if you are concerned, please try the patting method. I have not tried it myself so I can't speak for it's suitability.
 |
| Spray the batting. |
 |
| Smooth it and ensure it's wrinkle free. |
Once you're happy, roll the batting up, to expose the next section to be sprayed.
 |
| Next section ready to spray...and my helper. |
Spray the batting, roll it onto the fabric and smooth it out.
 |
| Keep spraying and smoothing the batting. |
Continue in this method until the batting is in place.
 |
| The batting is ready...with the dinosaur growing more curious. |
Next is the quilt top. Place the top, right side up, in the centre of the batting.
 |
| Make sure there are a few inches of batting around the edges of the quilt top. |
If you're spray basting, roll the top and spray the batting as before. Remembering to smooth, but not stretch, as you go.
 |
| Roll the top so it is easier to baste. |
 |
| Keep spraying the batting, rolling the top down and smoothing it out. |
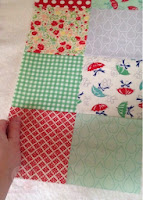 |
| Very gently adjust the top to ensure the seams are sitting flat. |
If you're pin basting, secure the edges of the smoothed top with tape or a heavy object.
Note: When I'm spray basting, I don't always pin as well. It will really depend on the size of the quilt. I would, however, recommend pinning at least a little if this is your first attempt at quilting.
When pinning, I will usually start in the centre of the quilt and work in a circular motion to the edges. Others start at one end and work down, rolling the quilt as they go. It really depends on your available space.
You want to pin every 4'' or less. Don't leave so big a gap that the fabric can easily move, but not so close that you're having to undo a pin every second stitch.
Remember to keep smoothing the quilt sandwich and making sure everything is tight.
 |
| Pins added every 4'' or less. |
It's not the most exciting job, I know, but take the time to baste your quilt properly. It will make a big difference when it comes to quilting.
 |
| Even the dinosaurs were getting bored. |
Once it's basted, check both the front and back for wrinkles or tucks. If you're happy that it's tight and not going to move too much, roll up your quilt sandwich and you're ready to go.
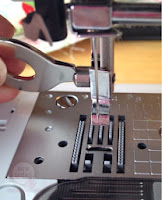
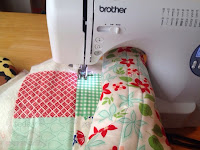
Your machine may be different than mine, but here's how my walking foot attaches.
Firstly, I remove both the foot and the presser foot holder from my machine.
 |
| A few bobbins of what is fast becoming my favourite colour thread. |
Make sure you have some space around your machine for the quilt. It's a good idea to have as much of the quilt on the table as possible, to take the weight and stop it pulling on the needle. I use my ironing board to hold the quilt to my left.
 |
| I set up my ironing board and table in an L shape to take the weight of the quilt. |
All set up? Let's start quilting.
I will be quilting straight lines about 3/8'' from either side of the seam lines, both horizontally and vertically. This is really easy to do and looks great.
Note: 'Stitch in the ditch' is a common quilting technique and often a favourite of beginners. It is where you stitch in the seam itself so that the quilting is hidden from the front. I haven't used it here for two reasons. One, I tend to find it easier to follow lines using my foot as a guide rather than the needle. Two, if we're going to all of this time and effort with quilting, then let's make sure people can see just how awesome we really are!!!
Start at one end of the quilt, with the foot lined up against the seam (or whatever guide you are using to obtain your desired distance). I am starting with the horizontal seams.
You don't need to backstitch at the beginning or end.
 |
| Line the edge of the foot against a seam. |
 |
| Hold the fabric like you normally would sewing. |
 |
| Make sure everything is sitting flat. |
Sew to the end. I tend to stop every few inches to adjust my quilt and make sure the next section is smooth and sitting flat. I have a very small machine so I need to do a lot of adjusting. That's fine with me as the last thing I want is to rush ahead and find I'd managed to bunch up my backing.
 |
| Sew to the end of the quilt top. |
Try and not force the quilt as you may break your needle. Just gently guide the quilt and let the walking foot feed it through. It really is no different to normal sewing, except you're probably working on a larger piece of fabric. Take your time and don't worry if there are a few hiccups along the way. You're still learning.
 |
| Our first quilting line complete |
Check the back too. If you already have tucks, it might worth adjusting your basting.
 |
| Don't forget to check the back. |
If you're happy with your first quilting line, roll up the right hand side of the quilt and start again on the other side of the seam.
 |
| I use pegs to keep the right hand side rolled up. |
 |
| Sew the vertical seams. |
 |
| Such a lovely pattern. |
I rushed a bit and managed to get two teeny tiny tucks in the back. They're barely even noticeable so we'll just call them a 'design feature'.
 |
| A design feature of my quilt. |
Keep on quilting until you have a line on either side of every seam. Don't worry about the edges for now. They will be taken care of during the binding.
You now have one quiltastically quilted quilt.
 |
| The back. |
 |
| Lovely. |
I don't usually trim my quilt sandwich until I'm ready to attach the binding, so, for now, she's just going to sit in my craft room and be admired.
Don't worry if there are some tucks in your quilt. It's all just part of the learning process. Trust me, it gets easier each time.
Next week is our last week with Binding and Finishing the Quilt. You will need:
- Your quilt
- Binding fabric
- Scissors or a rotary cutter, ruler and mat
- Walking foot
- Thread to match the binding fabric (unless you're intentionally using a contrast)
- Pins or clips.
Now is a good time to clean your machine too. Quilting can fluff it up very quickly.
Have you quilted your top and have suggestions for other participants? Please comment below and don't forget to add your photo to the
Facebook group.








Share great information about your blog , That’s what I was looking for. I am talking about all topics bundled in this blog. Blog really helpful for me. Thanks for share your blog here.
ReplyDeletecarpet steam cleaning Sydney
End of lease cleaning Penrith
The Carpet Fresh North East Ltd is a Middlesbrough based cleaning company, offering domestic and commercial services
ReplyDeleteacross the local area. From carpet cleaning to upholstery and much more, we have all your cleaning needs covered. We use
professional cleaning products and machinery to achieve the highest standards of finish. Contact us today for a free
quote.
Carpet Fresh North East -Best Carpet Cleaners Middlesbrough
We provide a comprehensive range of professional cleaning services to our customers in Middlesbrough and across the North
East & North Yorkshire. From carpets to beds and much more, we have all your cleaning needs covered. We ensure all work is
carried out to the highest standards and never compromise on quality.